Okay, first, a vocab lesson:
A joconde imprime (French Baking term) is a decorative design baked into a light sponge cake providing an elegant finish to desserts/torts/entremets/ formed in ring molds. A joconde batter is used because it bakes into a moist, flexible cake. The cake batter may be tinted or marbleized for a further decorative effect.
Entremets (French baking term)- an ornate dessert with many different layers of cake and pastry creams in a mold, usually served cold. Think Trifle in a mold vs. a glass bowl.
A joconde imprime is the outside cake wrapper of the Entremets dessert.

This is a pretty challenging cake to make, and more so, because I want to make it dairy-free. All in all, mine turned out okay. I didn't (still don't) have a small cake ring, so had to use a 9" one. *gasps* That's massive, therefore, I didn't have enough fillings to fill it right to the top. =(
I wanted to make another one after that first attempt, but it's just been too hectic. I will definitely try a green tea flavour one some time soon.
So here it is.
Dairy Free Hazelnut and Chocolate Joconde Entrement
Patterned Joconde-Décor Paste

Ingredients
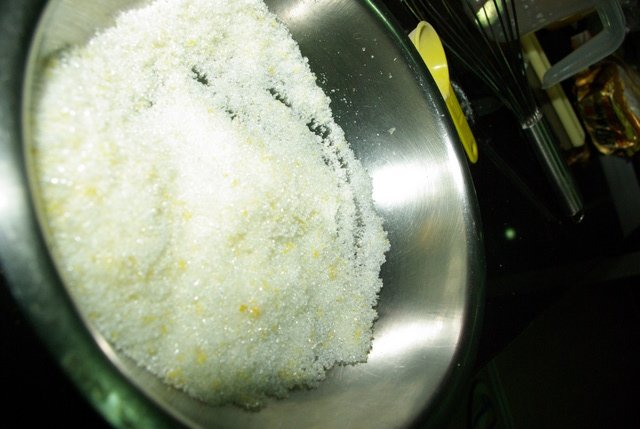
200g vegetable shortening
200g Confectioners' (icing) sugar
7 large egg whites (about 200g)
170g cake flour
60 g cocoa powder.
1. Cream butter and sugar until light and fluffy (use stand mixer with blade, hand held mixer, or by hand)
2. Gradually add egg whites. Beat continuously.
3. Sift the flour and cocoa powder together. Fold into the mixture.
4. Tint batter with coloring to desired color, if not making cocoa variation.
(Note: The quantity given here makes a LOT of batter. I do mean a lot. I made half of that and I ended up using only 1/3 of the mixture.)
To make the pattern:
1) Prepare the tray first: place a silicone baking mat on an upside down baking sheet. This makes it easier to spread. If you don't have a silicone mat, like myself, I used parchment paper. I wouldn't recommend waxed paper since it runs the risk of melting under such high temperature.
2) Pipe the paste onto the sheet. Or you could spread a thin layer on, then pattern it.
3) Freeze this for at least 20 minutes to give it time to freeze hard. In the meantime, move onto your sponge batter.
Joconde Sponge
Ingredients
85g hazelnut flour (original recipe called for almond flour)
75g confectioners' (icing) sugar
25g cake flour
3 large eggs (about 150g)
3 large egg whites (about 90g)
10g white granulated sugar or superfine (caster) sugar
1) Preheat the oven to 250ºC.
2) In a clean mixing bowl whip the egg whites and white granulated sugar to firm, glossy peeks. Reserve in a separate clean bowl to use later.
3) Sift hazelnut flour, confectioner’s sugar, cake flour. (This can be done into your dirty egg white bowl)
3. On medium speed, add the eggs a little at a time. Mix well after each addition. Mix until smooth and light. (If using a stand mixer use blade attachment. If hand held a whisk attachment is fine, or by hand. )
5) Fold in one third reserved whipped egg whites to almond mixture to lighten the batter. Fold in remaining whipped egg whites. Do not over mix.
6) If using almond meal, fold in 30g melted unsalted butter. (I omitted this, not just because it's not dairy-free, but mainly that hazelnut contain more oil than almond)
(Note: I would make the paste then the sponge, because the sponge batter doesn't seem to sit well for long)
7) Take the frozen pattern out of the freezer, spread the sponge batter over it.
8) Bake for 15 minutes until the joconde bounces back when slightly pressed. I only baked it for 4 minutes! Yes, FOUR! So PLEASE, keep an eye on the oven the whole time it's inside.
The mold I used is just a spring form pan ring with the bottom removed. Place a large piece of clingfilm over a sheet of parchment paper, then place the ring on top. Line the ring with clingfilm. (Original recipe says to pull the clingfilm tightly up the outside of the mold, line the inside with parchment paper.)

Ingredients
200g vegetable shortening
200g Confectioners' (icing) sugar
7 large egg whites (about 200g)
170g cake flour
60 g cocoa powder.
1. Cream butter and sugar until light and fluffy (use stand mixer with blade, hand held mixer, or by hand)
2. Gradually add egg whites. Beat continuously.
3. Sift the flour and cocoa powder together. Fold into the mixture.
4. Tint batter with coloring to desired color, if not making cocoa variation.
(Note: The quantity given here makes a LOT of batter. I do mean a lot. I made half of that and I ended up using only 1/3 of the mixture.)
To make the pattern:
1) Prepare the tray first: place a silicone baking mat on an upside down baking sheet. This makes it easier to spread. If you don't have a silicone mat, like myself, I used parchment paper. I wouldn't recommend waxed paper since it runs the risk of melting under such high temperature.
2) Pipe the paste onto the sheet. Or you could spread a thin layer on, then pattern it.
3) Freeze this for at least 20 minutes to give it time to freeze hard. In the meantime, move onto your sponge batter.
Joconde Sponge
 |  |  |
Ingredients
85g hazelnut flour (original recipe called for almond flour)
75g confectioners' (icing) sugar
25g cake flour
3 large eggs (about 150g)
3 large egg whites (about 90g)
10g white granulated sugar or superfine (caster) sugar
 |  |
2) In a clean mixing bowl whip the egg whites and white granulated sugar to firm, glossy peeks. Reserve in a separate clean bowl to use later.
3) Sift hazelnut flour, confectioner’s sugar, cake flour. (This can be done into your dirty egg white bowl)
3. On medium speed, add the eggs a little at a time. Mix well after each addition. Mix until smooth and light. (If using a stand mixer use blade attachment. If hand held a whisk attachment is fine, or by hand. )
5) Fold in one third reserved whipped egg whites to almond mixture to lighten the batter. Fold in remaining whipped egg whites. Do not over mix.
6) If using almond meal, fold in 30g melted unsalted butter. (I omitted this, not just because it's not dairy-free, but mainly that hazelnut contain more oil than almond)
(Note: I would make the paste then the sponge, because the sponge batter doesn't seem to sit well for long)
7) Take the frozen pattern out of the freezer, spread the sponge batter over it.
8) Bake for 15 minutes until the joconde bounces back when slightly pressed. I only baked it for 4 minutes! Yes, FOUR! So PLEASE, keep an eye on the oven the whole time it's inside.
The mold I used is just a spring form pan ring with the bottom removed. Place a large piece of clingfilm over a sheet of parchment paper, then place the ring on top. Line the ring with clingfilm. (Original recipe says to pull the clingfilm tightly up the outside of the mold, line the inside with parchment paper.)
That's the outside (and bottom) of the cake done. Now for the filling. =)
I've put two types of mousses in. Now, take note, they are made of tofu. Yes, Tofu. Weird, but hey, don't knock it till you've tried it. Because they just taste so amazing; and it's healthy! Well, kind of.
 |  |  |
300g silken tofu
300g bittersweet chocolate (dairy-free)
1 tbsp vanilla extract (optional)
1) Melt the chocolate in a double boiler. Set aside.
2) Process the tofu until it's smooth and creamy.
3) Add in the chocolate and vanilla.
4) Blend until fully incorporating.
5) Pour into the molded cake. Set in refrigerator.
Hazelnut Mousse
116g hazelnut butter (I made this just by processing hazelnut until the oils inside are released)
50g superfine sugar
300g silken tofu
1) Process the tofu until it's smooth and creamy.
2) Mix the hazelnut butter and the sugar, before adding into the tofu.
3) Process until well blended.
4) Pour on top of the chocolate mousse.
5) Leave to set inside the fridge for a few hours.


Well, we all learn from our mistakes. =)