Showing posts with label recipe. Show all posts
5:59 AM

Daring Bakers' Croissants

I've always been a little bit in love with Julia Child, especially after the movie, Julie and Julia.. So when I realised this month's challenge's recipe is from Mastering the Art of French Cooking, I swooned a little.

The Daring Bakers go retro this month! Thanks to one of our very talented non-blogging members, Sarah, the Daring Bakers were challenged to make Croissants using a recipe from the Queen of French Cooking, none other than Julia Child!


This croissant took sometime to prepare, what with a total prep time of 12 hours. But, trust me, it's worth it.


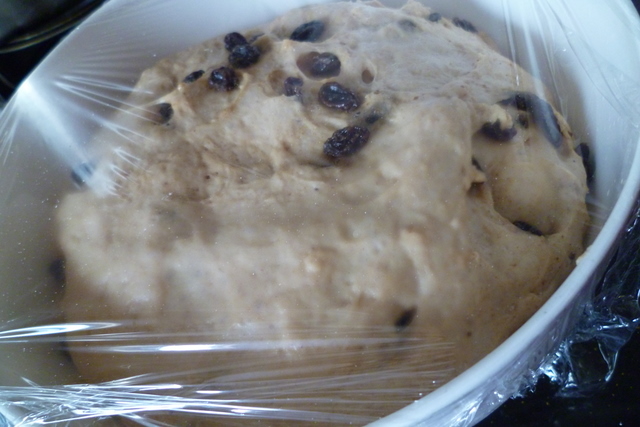
I made mine dairy free by replacing the milk with soy milk, and the butter with magarine. It still tastes surprisingly buttery!


Ingredients
¼ oz (7 gm) of fresh yeast, or 1¼ teaspoon (6¼ ml/4 gm) of dry-active yeast (about ½ sachet)
3 tablespoons (45 ml) warm water (less than 100°F/38°C)
1 teaspoon (5 ml/4½ gm) sugar
1 ¾ cups (225 gm/½ lb) of strong plain flour (I used Polish all-purpose flour, which is 13% protein)
2 teaspoons (10 ml/9 gm) sugar
1½ teaspoon (7½ ml/9 gm) salt
½ cup (120 ml/¼ pint) milk (I am not sure if the fat content matters. I used 2%)
2 tablespoons (30 ml) tasteless oil (I used generic vegetable oil)
½ cup (120 ml/1 stick/115 gm/¼ lb) chilled, unsalted butter
1 egg, for egg wash

1. Mix the yeast, warm water, and first teaspoon of sugar in a small bowl. Leave aside for the yeast and sugar to dissolve and the yeast to foam up a little.
2. Measure out the other ingredients
3. Heat the milk until tepid (either in the microwave or a saucepan), and dissolve in the salt and remaining sugar
4. Place the flour in a large bowl.
5. Add the oil, yeast mixture, and milk mixture to the flour
6. Mix all the ingredients together using the rubber spatula, just until all the flour is incorporated

11:57 PM

Daring Bakers' From Phyllo to Baklava...Rolls!

I've been MIA-ing for the past 2 months. Finally started my new course in Communicative Designs, and I've been swarmed! The art school is called The One Academy, TOA, which, rightly-so also stands for Tons Of Assignments.

But here I am! On what I call a 'none-holiday'. Because we only get 2 days off out of the supposed week. *sigh* and I have to spend this time doing what is a mountain of work.

Enough rant.

BAKLAVA!!

Erica of Erica’s Edibles was our host for the Daring Baker’s June challenge. Erica challenged us to be truly DARING by making homemade phyllo dough and then to use that homemade dough to make Baklava.

I've never even tasted these before. I have, however seen them on menus at some middle-eastern restaurants, and i have a friend who swears they are the best tasting dessert on earth. So imagine my delight when I found out we had to make these.

Phyllo Pastry

Ingredients
1 1/3 cups (320 ml) (185 gm/6½ oz) unbleached all purpose (plain) flour
1/8 teaspoon (2/3 ml) (¾ gm) salt
1/2 cup less 1 tablespoon (105 ml) water, plus more if needed
2 tablespoons (30 ml) vegetable oil, plus additional for coating the dough
1/2 teaspoon (2½ ml) cider vinegar (I actually use red wine vinegar.)

1. In the bowl of your stand mixer combine flour and salt
2. Mix with paddle attachment
3. Combine water, oil and vinegar in a small bowl.
4. Add water & oil mixture with mixer on low speed, mix until you get a soft dough, if it appears dry add a little more water.

5. Change to the dough hook and let knead approximately 10 minutes. You will end up with beautiful smooth dough. If you are kneading by hand, knead approx. 20 minutes.
6. Remove the dough from mixer and continue to knead for 2 more minutes. Pick up the dough and through it down hard on the counter a few times during the kneading process.(Note: Good de-stresser; mental note: must make this more often.)
7. Shape the dough into a ball and lightly cover with oil.
8. Wrap tightly in plastic wrap and let rest 30-90 minutes, longer is best ( I let mine rest for just over 2 hours)

9. After resting, flour the heck out of everything, because you canNOT over-flour this dough. And cut off a chunk about the size of a golf ball and start rolling.
Looky here for how. =)


Filling

Ingredients
Zest of an orange
1 cup Almond
1/2 cup Hazelnut
8 tbsp sugar
1 tsp nutmeg
2 tsp cinnamon

1. Using a processor crush the almond and hazelnut with 2 tbsp of sugar.
2. Mix everything together.

Baklava Making!
(Makes enough rolls to fit an 8" square baking dish)

1/2 cup oil (original recipe says clarified butter, but I'm lactose intolerant, hence the oil.)

1. Preheat oven to moderate 350°F/180°C/gas mark 4.
2. Butter your baking dish.
3. Take a sheet of phyllo pastry and oil the top, sprinkle with the nut mixture liberally, and using a thin dower or, like I did, by using a long chopstick, roll up the pastry.
4. Oil a second sheet, and place this rolled up pastry, with the chopstick still intact, and roll up in the second sheet.
5. Push down into the pan, releasing the chopstick.
I know this sound so confusing, I don't even understand that myself, so please do watch this.
6. Repeat until you have used up all the pastry. and oil the top of them.
7. Using scissors, snipped half way through the rolls, and bake for 30 mins.
8. Snipped the whole way down and bake for another 30 minutes, until golden brown.
9. Pour the syrup, mostly into the gaps, and some on top. (You will hear a sizzle, this is the pastry drinking up that juice)
10. Leave overnight to let it absorb and develop this amazing texture.


Cinnamon Citrus Syrup

Ingredients
1 1/2 cup fresh orange juice
1 cinnamon stick
1 cup sugar
1 2-inch slice of citrus peel (I used a lemon)
1/2 teaspoon nutmeg
1 teaspoon cinnamon

When you put your baklava in the oven start making your syrup. When you combine the two, one of them needs to be hot, I find it better when the baklava is hot and the syrup has cooled.

1. Put everything except the nutmeg and the cinnamon powder into a pot, and boil for 10 minutes, stirring occasionally.
2. Strain the the syrup, and mix in the nutmeg and cinnamon.
3. Let it cool.


*Just outta ze oven*

*Slurping up the syrup*

Aren't they a thing of beauty?
Taste oh-so-nice!!
10:47 PM

Cinnamon Swirl Raisin Bread


Imagine this: every morning, you wake up in bed and smell that freshly baked loaf of bread.
Oh wait, I think I might have to move above a bakery for that.

I've never really had much luck when it comes to bread. All sorts of problems arise: they don't rise, they are too dry, etc.

But I'm not discouraged. In fact it made me all the more determined to get it right.
And I think I might have found my saviour in this recipe.


Cinnamon Swirl Raisin Bread
Makes one 1/2 pound loaf
recipe on page 147 of The Bread Baker’s Apprentice by Peter Reinhardt.

For the dough:

226g unbleached bread flour
2 tsp sugar
a scant 3/4 tsp salt
1 tsp instant yeast
1 1/8 tsp cinnamon
less than 1 egg, slightly beaten / .825 ounces
1 tbsp shortening, melted or at room temperature
1/4 cup (60ml) buttermilk at room temperature
1/4 cup (60ml) plus 2 tbsp water, at room temperature
3/4 cup raisins - rinsed and drained

For the cinnamon swirl:

40g sugar
1 tbsp cinnamon

1. Stir together the flour, sugar, salt, yeast and cinnamon in a large bowl or bowl of a stand mixer. Add the egg, shortening, buttermilk, and water.
2. Stir together with a wooden spoon or the paddle attachment until the ingredients come together and form a ball. Adjust with flour or water if the dough seems too sticky or too dry and stiff. (I'm no expert, but I think it's better if you start with a drier dough, then slowly work in water bit by bit)
3. Sprinkle flour on the counter, transfer the dough to the counter and begin kneading (or mixing on medium speed, switching to the dough hook). The dough should be soft and pliable, tacky but not sticky. Add flour as you knead (or mix), if necessary, to achieve this texture. Knead by hand for approximately 10 minutes (or by machine for 6 - 8 minutes). The dough should pass the window pane test.
4. Once it passes the test, knead in the raisins by hand to ensure even distribution. Lightly oil a large bowl and transfer the dough to the bowl, rolling to coat it with oil. Cover the bowl with plastic wrap.


3. Proof at room temperature for approximately 2 hours, or until the dough doubles in size. This only took about 1.5 hour for me.


4. Pat the dough into a 5 inch wide by 8 inch long rectangle about 1/3 inch thick. Sprinkle a generous amount of cinnamon sugar over the dough. Then working from the short side of the dough, roll up the length of the dough one section at a time, pinching the crease with each rotation to strengthen the surface tension. The loaf will spread out as you roll it up, eventually extending to a full 8-9 inches long. Pinch the final seam closed with your thumbs. Rock the loaf around to even it out and push the ends in so that they are not tapered. Keep the surface of the loaf even across the top. Place the loaf in a lightly oiled 8 1/2 - 4 1/2 inch pan, mist the top with cooking spray and cover with plastic wrap or a kitchen towel.


5. Proof for 60 - 90 minutes or until the dough crests above the lips of the pan and is nearly doubled in size.
6. Preheat oven to 350F. Once the loaf is proofed, place loaf pan on a rack in the middle of the oven. Bake the loaf for 20 minutes, then rotate the pan 180 degrees and bake for another 20-30 minutes. The finished bread should register at 190F in the center and be golden brown on the top. It should make a hollow sound when thumped on the bottom.
7. Immediately remove from the pan. If desired, spread 1 tbsp of melted butter on the top and sprinkle some more cinnamon sugar to create a sugary crust.


8. Cool for at least 1 hour before slicing or serving.


10:43 PM

Pepperidge Farm Sausalito Cookies *COPYCAT*~~


And so I was walking in the hypermarket with my brother. He abruptly stopped in the middle of the biscuit/cookie aisle. Turned around and said, 'Let's make these cookies.'

"These cookies" refer to Pepperidge Farm Sausalito Cookies.


After some digging, we found something that looked pleasing. I made some changes to it, and voila... Here is the results:


Ingredients
226g softened unsalted butter
1 large egg
1 teaspoon vanilla
100g brown sugar
30g granulated sugar
1/2 teaspoon baking powder
1 1/2 teaspoons baking soda
1/2 teaspoon salt
2 1/2 cups all-purpose flour
255g macadamia nuts, chopped
283g white chocolate, chopped (I used chocolate chips)


1) Preheat over to 180°C.
2) Sift flour, baking soda, baking powder and salt into a bowl.
3) In the bowl of a mixer, beat butter, sugars, egg until creamy.
4) Add vanilla.
5) Scrape down the sides of bowl occasionally.
6) Add dry ingredients and mix until incorporated.
7) Fold in nuts and chocolate.
8) Line baking trays with parchment paper.
9) Form 1 inch balls. (Being the control freak that I am, I weighed each ball - 14g yields a good size cookie)
10) Remember they spread, so give them space to breath.
11) Bake about 13-15 minutes.
12) Makes about 40 cookies. (Which you can keep to yourself, or you can give to your family. Maybe.)


Just a random question, though.
Why do people love it when they receive homemade goodies?

5:52 PM

Joconde Imprime / entremets~~ (Dairy Free French Dessert)

The January 2011 Daring Bakers’ challenge was hosted by Astheroshe of the blog accro. She chose to challenge everyone to make a Biscuit Joconde Imprime to wrap around an Entremets dessert.


Okay, first, a vocab lesson:
A joconde imprime (French Baking term) is a decorative design baked into a light sponge cake providing an elegant finish to desserts/torts/entremets/ formed in ring molds. A joconde batter is used because it bakes into a moist, flexible cake. The cake batter may be tinted or marbleized for a further decorative effect.

Entremets (French baking term)- an ornate dessert with many different layers of cake and pastry creams in a mold, usually served cold. Think Trifle in a mold vs. a glass bowl.
A joconde imprime is the outside cake wrapper of the Entremets dessert.


This is a pretty challenging cake to make, and more so, because I want to make it dairy-free. All in all, mine turned out okay. I didn't (still don't) have a small cake ring, so had to use a 9" one. *gasps* That's massive, therefore, I didn't have enough fillings to fill it right to the top. =(
I wanted to make another one after that first attempt, but it's just been too hectic. I will definitely try a green tea flavour one some time soon.

So here it is.

Dairy Free Hazelnut and Chocolate Joconde Entrement

Patterned Joconde-Décor Paste


Ingredients
200g vegetable shortening
200g Confectioners' (icing) sugar
7 large egg whites (about 200g)
170g cake flour
60 g cocoa powder.

1. Cream butter and sugar until light and fluffy (use stand mixer with blade, hand held mixer, or by hand)
2. Gradually add egg whites. Beat continuously.
3. Sift the flour and cocoa powder together. Fold into the mixture.
4. Tint batter with coloring to desired color, if not making cocoa variation.

(Note: The quantity given here makes a LOT of batter. I do mean a lot. I made half of that and I ended up using only 1/3 of the mixture.)


To make the pattern:
1) Prepare the tray first: place a silicone baking mat on an upside down baking sheet. This makes it easier to spread. If you don't have a silicone mat, like myself, I used parchment paper. I wouldn't recommend waxed paper since it runs the risk of melting under such high temperature.
2) Pipe the paste onto the sheet. Or you could spread a thin layer on, then pattern it.
3) Freeze this for at least 20 minutes to give it time to freeze hard. In the meantime, move onto your sponge batter.

Joconde Sponge


Ingredients
85g hazelnut flour (original recipe called for almond flour)
75g confectioners' (icing) sugar
25g cake flour
3 large eggs (about 150g)
3 large egg whites (about 90g)
10g white granulated sugar or superfine (caster) sugar

1) Preheat the oven to 250ºC.
2) In a clean mixing bowl whip the egg whites and white granulated sugar to firm, glossy peeks. Reserve in a separate clean bowl to use later.
3) Sift hazelnut flour, confectioner’s sugar, cake flour. (This can be done into your dirty egg white bowl)
3. On medium speed, add the eggs a little at a time. Mix well after each addition. Mix until smooth and light. (If using a stand mixer use blade attachment. If hand held a whisk attachment is fine, or by hand. )
5) Fold in one third reserved whipped egg whites to almond mixture to lighten the batter. Fold in remaining whipped egg whites. Do not over mix.
6) If using almond meal, fold in 30g melted unsalted butter. (I omitted this, not just because it's not dairy-free, but mainly that hazelnut contain more oil than almond)

(Note: I would make the paste then the sponge, because the sponge batter doesn't seem to sit well for long)

7) Take the frozen pattern out of the freezer, spread the sponge batter over it.
8) Bake for 15 minutes until the joconde bounces back when slightly pressed. I only baked it for 4 minutes! Yes, FOUR! So PLEASE, keep an eye on the oven the whole time it's inside.

The mold I used is just a spring form pan ring with the bottom removed. Place a large piece of clingfilm over a sheet of parchment paper, then place the ring on top. Line the ring with clingfilm. (Original recipe says to pull the clingfilm tightly up the outside of the mold, line the inside with parchment paper.)

That's the outside (and bottom) of the cake done. Now for the filling. =)
I've put two types of mousses in. Now, take note, they are made of tofu. Yes, Tofu. Weird, but hey, don't knock it till you've tried it. Because they just taste so amazing; and it's healthy! Well, kind of.


Chocolate Mousse
300g silken tofu
300g bittersweet chocolate (dairy-free)
1 tbsp vanilla extract (optional)

1) Melt the chocolate in a double boiler. Set aside.
2) Process the tofu until it's smooth and creamy.
3) Add in the chocolate and vanilla.
4) Blend until fully incorporating.
5) Pour into the molded cake. Set in refrigerator.

Hazelnut Mousse
116g hazelnut butter (I made this just by processing hazelnut until the oils inside are released)
50g superfine sugar
300g silken tofu

1) Process the tofu until it's smooth and creamy.
2) Mix the hazelnut butter and the sugar, before adding into the tofu.
3) Process until well blended.
4) Pour on top of the chocolate mousse.
5) Leave to set inside the fridge for a few hours.


Yes, I know my cutting skills sucks in this. I should have wiped the knife first.
Well, we all learn from our mistakes. =)