8:29 PM

Daring Bakers' Panna Cotta & Florentine Cookies


The February 2011 Daring Bakers’ challenge was hosted by Mallory from A Sofa in the Kitchen. She chose to challenge everyone to make Panna Cotta from a Giada De Laurentiis recipe and Nestle Florentine Cookies.

This month has been a tad hectic. With Chinese New Year at the start of the month, the preparation for that was chaotic, but fun.


The second half of the month freed up a lil'. But I have an excuse! It was my birthday! teehee.. So yeah, I slacked off until now..

Florentine Cookies
Ingredients

150 g unsalted butter
160 g quick oats
230 g granulated sugar (I only used 30g, and it still turned out pretty sweet to me)
95 g plain (all purpose) flour
60 ml dark corn syrup (I replaced this with 1/4 molasses and 3/4 honey)
60 ml whole milk
1 tsp vanilla extract
pinch of salt
250 gm dark or milk chocolate (I only used half of this to drizzle ontop)


1) Preheat oven to moderately hot 190°C. Prepare your baking sheet with silpat or parchment paper.
2) Melt butter in a medium saucepan, then remove from the heat.
3) To the melted butter add oats, sugar, flour, corn syrup, milk, vanilla, and salt. Mix well.
4)Drop a tablespoon full, three inches (75 mm) apart, onto your prepared baking sheet. Flatten slightly with the back of your tablespoon, or use a spatula.
5) Bake in preheated oven for 6-8 minutes, until cookies are golden brown. Cool completely on the baking sheets.
6) While the cookies are cooling melt your chocolate until smooth either in the microwave, or stove top (in a double boiler, or a bowl that fits atop a saucepan filled with a bit of water, being sure the water doesn't touch the bottom of the bowl).
7) Peel the cookies from the silpat or parchment and place face down on a wire rack set over a sheet of wax/parchment paper (to keep counters clean).
8)Either spread on the bottom flat side of the cookies and sandwich them together. Or just put the chocolate in a piping bag and drizzle on top. Or you could do both, which is always good. =)


Chocolate Panna Cotta

Ingredients
240 ml whole milk
1 tablespoon unflavored powdered gelatin
480 ml whipping cream (30+% butterfat)
115 g sugar
145 g bittersweet or semisweet chocolate
½ teaspoon vanilla extract


1) Pour milk into a small bowl, sprinkle gelatin over the top, set aside for 2-5 minutes.
2) Place a medium saucepan over medium heat, stir in cream, sugar and vanilla. Bring to a low boil.
3) Add chocolate and whisk until melted. Whisk the milk/gelatin mixture into chocolate cream mixture. Whisk until gelatin has dissolved.
4) Transfer to ramekins, or nice glasses for serving.
5) Cover and chill at least 8 hours, or overnight

Coffee Gelée
Ingredients
480 ml good quality brewed coffee
60 ml hot water + 2 tablespoons
30 ml cold water
115 g granulated sugar
1½ teaspoons unflavored powdered gelatin
2 teaspoons vanilla extract


1) Place granulated sugar and 1/4 c. hot water in a small saucepan. Bring to a boil, stir until the sugar has dissolved.
2) Sprinkle gelatin over 2 Tablespoons cold water and let it soften 2 minutes or so.
3) Stir the coffee, sugar, hot water, and vanilla into a small metal bowl, add gelatin mixture and stir well until gelatin has dissolved. If pouring over Panna Cotta, be sure that this mixture is no longer hot, it will melt Panna Cotta if it is, let it come to room temperature.

The Panna Cotta set beautifully, but the gelee were horrible. They didn't set right and was still liquid-ish.

I also made a Vanilla Panna Cotta with lemon gelee, again the gelee didn't set. I have no idea why.


I wanted to make a dairy free version, but I didn't have time to try them out. Maybe I'll try that sometime soon.
10:43 PM

Pepperidge Farm Sausalito Cookies *COPYCAT*~~


And so I was walking in the hypermarket with my brother. He abruptly stopped in the middle of the biscuit/cookie aisle. Turned around and said, 'Let's make these cookies.'

"These cookies" refer to Pepperidge Farm Sausalito Cookies.


After some digging, we found something that looked pleasing. I made some changes to it, and voila... Here is the results:


Ingredients
226g softened unsalted butter
1 large egg
1 teaspoon vanilla
100g brown sugar
30g granulated sugar
1/2 teaspoon baking powder
1 1/2 teaspoons baking soda
1/2 teaspoon salt
2 1/2 cups all-purpose flour
255g macadamia nuts, chopped
283g white chocolate, chopped (I used chocolate chips)


1) Preheat over to 180°C.
2) Sift flour, baking soda, baking powder and salt into a bowl.
3) In the bowl of a mixer, beat butter, sugars, egg until creamy.
4) Add vanilla.
5) Scrape down the sides of bowl occasionally.
6) Add dry ingredients and mix until incorporated.
7) Fold in nuts and chocolate.
8) Line baking trays with parchment paper.
9) Form 1 inch balls. (Being the control freak that I am, I weighed each ball - 14g yields a good size cookie)
10) Remember they spread, so give them space to breath.
11) Bake about 13-15 minutes.
12) Makes about 40 cookies. (Which you can keep to yourself, or you can give to your family. Maybe.)


Just a random question, though.
Why do people love it when they receive homemade goodies?

1:39 PM

Happy Valentine's Day

I choose to wish everyone today, and not yesterday.

Because I think love should not be defined by what day it is.
I'm one of those anti-valentine's people, who condone everything about the day.
Sure, overpriced flowers and jewelries can be a bit too much, but what girl doesn't like to be romanced a little.

So.. all couples out there, hope you had a lovely day.

Those who are single, be happy. Give yourself a treat. =)
Mr/Ms Right is just around the corner.

5:52 PM

Joconde Imprime / entremets~~ (Dairy Free French Dessert)

The January 2011 Daring Bakers’ challenge was hosted by Astheroshe of the blog accro. She chose to challenge everyone to make a Biscuit Joconde Imprime to wrap around an Entremets dessert.


Okay, first, a vocab lesson:
A joconde imprime (French Baking term) is a decorative design baked into a light sponge cake providing an elegant finish to desserts/torts/entremets/ formed in ring molds. A joconde batter is used because it bakes into a moist, flexible cake. The cake batter may be tinted or marbleized for a further decorative effect.

Entremets (French baking term)- an ornate dessert with many different layers of cake and pastry creams in a mold, usually served cold. Think Trifle in a mold vs. a glass bowl.
A joconde imprime is the outside cake wrapper of the Entremets dessert.


This is a pretty challenging cake to make, and more so, because I want to make it dairy-free. All in all, mine turned out okay. I didn't (still don't) have a small cake ring, so had to use a 9" one. *gasps* That's massive, therefore, I didn't have enough fillings to fill it right to the top. =(
I wanted to make another one after that first attempt, but it's just been too hectic. I will definitely try a green tea flavour one some time soon.

So here it is.

Dairy Free Hazelnut and Chocolate Joconde Entrement

Patterned Joconde-Décor Paste


Ingredients
200g vegetable shortening
200g Confectioners' (icing) sugar
7 large egg whites (about 200g)
170g cake flour
60 g cocoa powder.

1. Cream butter and sugar until light and fluffy (use stand mixer with blade, hand held mixer, or by hand)
2. Gradually add egg whites. Beat continuously.
3. Sift the flour and cocoa powder together. Fold into the mixture.
4. Tint batter with coloring to desired color, if not making cocoa variation.

(Note: The quantity given here makes a LOT of batter. I do mean a lot. I made half of that and I ended up using only 1/3 of the mixture.)


To make the pattern:
1) Prepare the tray first: place a silicone baking mat on an upside down baking sheet. This makes it easier to spread. If you don't have a silicone mat, like myself, I used parchment paper. I wouldn't recommend waxed paper since it runs the risk of melting under such high temperature.
2) Pipe the paste onto the sheet. Or you could spread a thin layer on, then pattern it.
3) Freeze this for at least 20 minutes to give it time to freeze hard. In the meantime, move onto your sponge batter.

Joconde Sponge


Ingredients
85g hazelnut flour (original recipe called for almond flour)
75g confectioners' (icing) sugar
25g cake flour
3 large eggs (about 150g)
3 large egg whites (about 90g)
10g white granulated sugar or superfine (caster) sugar

1) Preheat the oven to 250ºC.
2) In a clean mixing bowl whip the egg whites and white granulated sugar to firm, glossy peeks. Reserve in a separate clean bowl to use later.
3) Sift hazelnut flour, confectioner’s sugar, cake flour. (This can be done into your dirty egg white bowl)
3. On medium speed, add the eggs a little at a time. Mix well after each addition. Mix until smooth and light. (If using a stand mixer use blade attachment. If hand held a whisk attachment is fine, or by hand. )
5) Fold in one third reserved whipped egg whites to almond mixture to lighten the batter. Fold in remaining whipped egg whites. Do not over mix.
6) If using almond meal, fold in 30g melted unsalted butter. (I omitted this, not just because it's not dairy-free, but mainly that hazelnut contain more oil than almond)

(Note: I would make the paste then the sponge, because the sponge batter doesn't seem to sit well for long)

7) Take the frozen pattern out of the freezer, spread the sponge batter over it.
8) Bake for 15 minutes until the joconde bounces back when slightly pressed. I only baked it for 4 minutes! Yes, FOUR! So PLEASE, keep an eye on the oven the whole time it's inside.

The mold I used is just a spring form pan ring with the bottom removed. Place a large piece of clingfilm over a sheet of parchment paper, then place the ring on top. Line the ring with clingfilm. (Original recipe says to pull the clingfilm tightly up the outside of the mold, line the inside with parchment paper.)

That's the outside (and bottom) of the cake done. Now for the filling. =)
I've put two types of mousses in. Now, take note, they are made of tofu. Yes, Tofu. Weird, but hey, don't knock it till you've tried it. Because they just taste so amazing; and it's healthy! Well, kind of.


Chocolate Mousse
300g silken tofu
300g bittersweet chocolate (dairy-free)
1 tbsp vanilla extract (optional)

1) Melt the chocolate in a double boiler. Set aside.
2) Process the tofu until it's smooth and creamy.
3) Add in the chocolate and vanilla.
4) Blend until fully incorporating.
5) Pour into the molded cake. Set in refrigerator.

Hazelnut Mousse
116g hazelnut butter (I made this just by processing hazelnut until the oils inside are released)
50g superfine sugar
300g silken tofu

1) Process the tofu until it's smooth and creamy.
2) Mix the hazelnut butter and the sugar, before adding into the tofu.
3) Process until well blended.
4) Pour on top of the chocolate mousse.
5) Leave to set inside the fridge for a few hours.


Yes, I know my cutting skills sucks in this. I should have wiped the knife first.
Well, we all learn from our mistakes. =)
4:23 PM

MasterChef


I'm absolutely addicted to MasterChef. First saw Junior MasterChef Australia on Astro. And it was just great.


You don't get the drama and falsity that you would be expected to get from the average reality TV shows.
The junior version is filled with encouragements.

It puts me to shame that these kids can cook so well, yet I know some adults who can barely fry an egg properly.

I can't wait for the next season of it to arrive sometime this year.

Then we move onto the adult, seemingly more matured, version of MasterChef.
I started off with the USA version, with Gordon Ramsay as one of the judges. As we all know, with Ramsay there, we can't go without swearing. And I have to say, MasterChef USA is a total rip-off.

It was a pure competition, with no coaching, not much guidance along the way. It says they were out to find "The Best Amateur Chef in the country"; well, possibly that's true. But weren't they supposed to be coached to become better chefs? To elevate to a different level?

Compare that to the Australia version, they are worlds apart.


The Australia version actually gives MasterClasses to the contestants, who were also sent to restaurants to gain work experience. They have more than just a mere handful of challenges.

And, I like the judges better.. =)


I'm only onto season 1; and I'm learning so much from it.
10:20 AM

Lemon Poppy Seed Muffins


There's something about lemony, citrus-y things that appeals to me.
The bright colour?
The refreshing fragrance?
The sour-yet-sweet flavour?

And what is it that makes lemon and poppy seed such a perfect match?
Whatever it is; these cupcakes are yummeh.

The recipe is actually from Joy the Baker, one of my favourite food blogger. I just find her funny; and of course, I torture myself by looking at her photographs while at work. Including these muffins.


Ingredients
2/3 cup granulated sugar
zest and juice of 1 lemon
2 cups all-purpose flour
2 teaspoons baking powder
1/4 teaspoon baking soda
1/4 teaspoon salt
3/4 cup buttermilk or sour cream (I made my buttermilk using milk and a couple tablespoon of lemon juice)
2 large eggs
1 teaspoon vanilla extract
1 stick (8 Tablespoons) butter, melted until browned and cooled
2 Tablespoons poppy seeds
2 Tablespoons granulated sugar (for topping the batter before baking)

For the Glaze

1 cup powdered sugar whisked together with 2 or 3 Tablespoons of lemon juice


1) Preheat oven to 195°C. Line a 12 mold, regular sized muffin tray with paper muffin liners, place the muffin pan on a baking sheet and set aside.

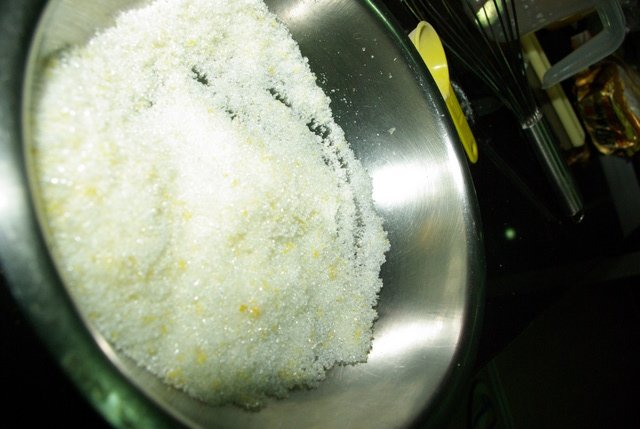
2) In a large bowl, rub the granulated sugar with the lemon zest until the sugar is lightly colored and scented with lemon. (Note: this rubbing releases the essential oil inside the lemon zest.)


3) Whisk in the flour, baking powder, baking soda and salt. In a medium sized bowl whisk together the eggs, buttermilk, vanilla extract, melted butter and lemon juice.

4) Add the wet ingredients to the dry ingredients and fold together. When almost thoroughly mixed, add the poppy seeds.

5) Divide batter between muffin cups. (I'm so meticulous, I measured each cup.)

6) Sprinkle each would be muffin with granulated sugar.

7) Bake for 15 to 18 minutes or until the tops are golden and a skewer inserted in the center of the muffin comes out clean.

8) Let cool in the pan for 5 minutes then transfer to a wire rack to cool completely before glazing.

Somehow mine were a bit sticky; and the muffin case stuck to the cake. I think I'll try this recipe again.